This chapter tells you how to install and remove EISA (Extended Industry Standard Architecture) boards. EISA boards are expansion boards that add functionality to your system through a standard bus.
 | Note: PC software device drivers are not compatible with the Indigo2 workstation. |
To install an EISA board, you must shut down the system, remove the cover, install the EISA board, and replace the cover.
To shut down and power off the system, follow these steps:
Open the front cover.
Press and release the power switch on the front of the system to shut down the software and power off the system.
The system powers off automatically.
Disconnect the power cable from back of the system.
To remove the cover, follow these steps:
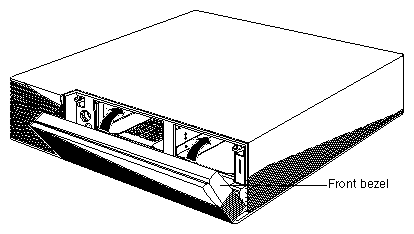
Remove the front bezel.
Press down on the tabs on each side of the bezel, as shown in Figure 4-1.
Pull the bezel down and away from the chassis.
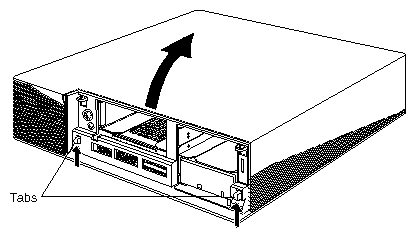
Remove the top cover.
Press up on the tabs on each side of the drive openings and pull up on the cover.
Rotate the cover back and away from the chassis, as shown in Figure 4-2.

To install the EISA board, follow these steps:
Ground yourself to a metal part of the Indigo2 chassis.

Caution: The EISA board is extremely sensitive to static electricity; you must wear the wrist strap while installing it. The wrist strap prevents the flow of static electricity, which could damage the board. Put the wrist strap over your wrist, making sure it is tight against your arm.
Attach its alligator clip to a metal part of the Indigo2 chassis.
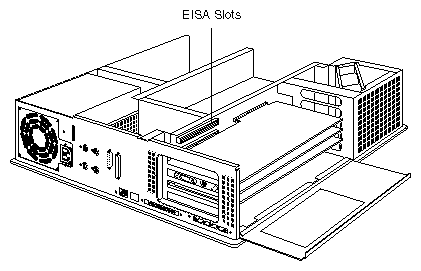
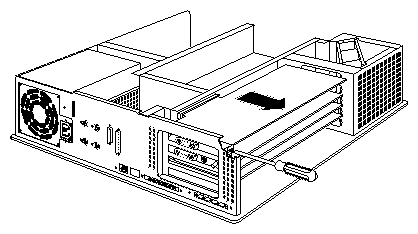
Move the system or position yourself so that you are facing the EISA slots.
The EISA slots are located on the left side of the system, behind the internal fan, as shown in Figure 4-3.
Open the metal panel located in front of the EISA slots by pulling up on the door and lowering it, as shown in Figure 4-4.
Remove the small cover that covers the slot in the back of the system in which you are installing the EISA board.
Remove the screw that attaches the cover to the system. The screw is located inside the system on the outer end of the cover.
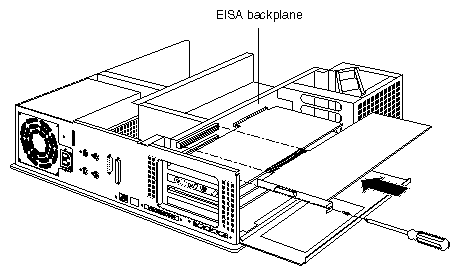
Install the board.
Align the right side of the board with the metal grooves on the right.
Align the connector on the left side of the board with the connector opening on the left.Push the board into the slot until the connector on the back of the board is securely connected to the port on the backplane, as shown in Figure 4-5.
Insert and tighten the screw that holds the board to the chassis.
The screw opening is located on the metal bracket on the upper left side of the board.
Tip the metal panel up until it snaps into place, as shown in Figure 4-6.


To replace the cover, follow these steps:
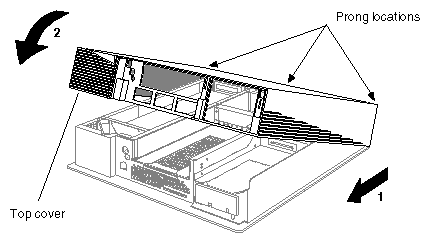
Place the prongs on the underside of the cover into the slots under the top ridge of the backplane of the chassis, as shown in Figure 4-7.
Lower the cover down onto the chassis until it snaps into place.
Replace the front bezel.
Place the tabs on the bottom of the bezel in the grooves in the front of the chassis, as shown in Figure 4-8.
Tilt the bezel up until it snaps into place.
Reconnect the power cable to the connector on the back of the system.
You are finished installing the EISA board and are ready to start up the system.
To remove an EISA board from the Indigo2 chassis, you must shut down the system, remove the cover, remove the EISA board, and replace the cover.
To shut down and power off the system, follow these steps:
Open the front cover.
Press and release the power switch on the front of the system to shut down the software and power off the system.
The system powers off automatically.
Disconnect the power cable from back of the Indigo2.
To remove the cover, follow these steps:
Remove the front bezel.
Press down on the tabs on each side of the bezel, as shown in Figure 4-9.
Pull the bezel down and away from the chassis.
Remove the top cover.
Press up on the tabs on each side of the drive openings and pull up on the cover.
Rotate the cover back and away from the chassis, as shown in Figure 4-10.
To remove the EISA board, follow these steps:
Ground yourself to a metal part of the Indigo2.
Put the wrist strap over your wrist making sure it is tight against your arm.
Attach its alligator clip to a metal part of the Indigo2.
Caution: The EISA board is extremely sensitive to static electricity; you must wear the wrist strap while installing it. The wrist strap prevents the flow of static electricity, which could damage the board. Move the system or position yourself so that you are facing the EISA slots.
The EISA slots are located on the left side of the system, behind the internal fan.
Open the metal panel located in front of the EISA expansion slots by pulling up on the panel and lowering it down, as shown in Figure 4-11.
Remove the screw attaching the EISA board to the system slot, as shown in Figure 4-12.
The screw is located on the upper left side of the board.
Pull the board out of the system.
Grasp the board with both hands, and pull it out of the slot.
Set the board down on a flat, antistatic surface so that the side with the chips on it faces up.
To replace the cover on the Indigo2 chassis:
Place the back of the cover into the grooves in the back of the chassis, as shown in Figure 4-13.
Lower the cover down onto the chassis until it snaps into place.
Replace the front bezel.
Place the tabs on the bottom of the bezel in the grooves in the front of the chassis, as shown in Figure 4-14.
Tilt the bezel up until it snaps into place.
Reconnect the power cable to the connector on the back of the system.
You are finished removing the EISA board and are ready to power up the system.