This chapter shows you how to set up and use your Silicon Graphics® Tezro™ visual workstation in the following sections:
This section covers the following topics:
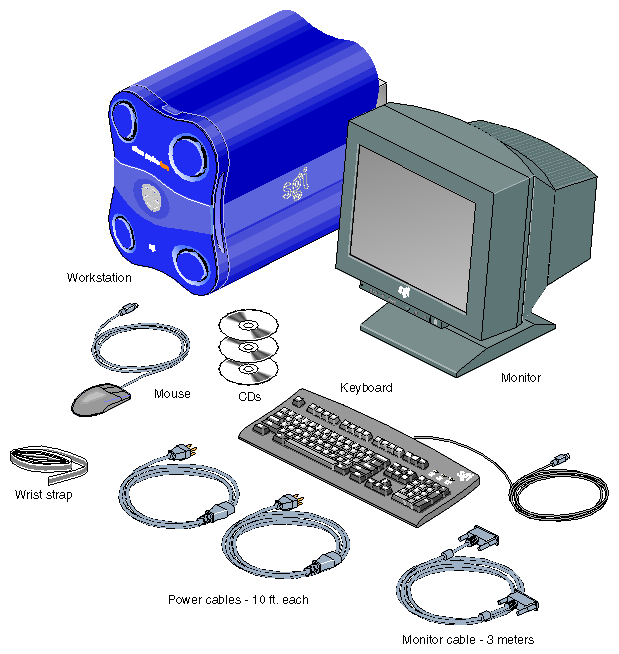
Figure 1-1 shows the basic components that ship with your workstation. If parts of your shipment are damaged or missing, contact your support provider.
The base workstation configuration weighs 60 lb. (27 kg). SGI highly recommends that two people lift the unit when it must be moved. Lift the unit by placing your hands under the bottom edges of the chassis, as shown in Figure 1-2.

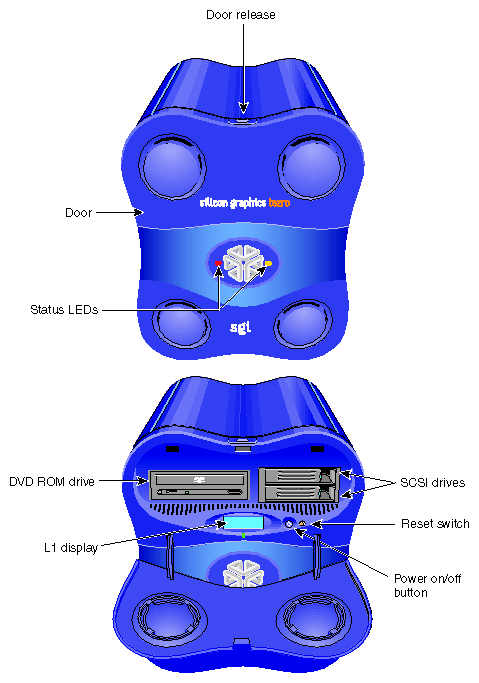
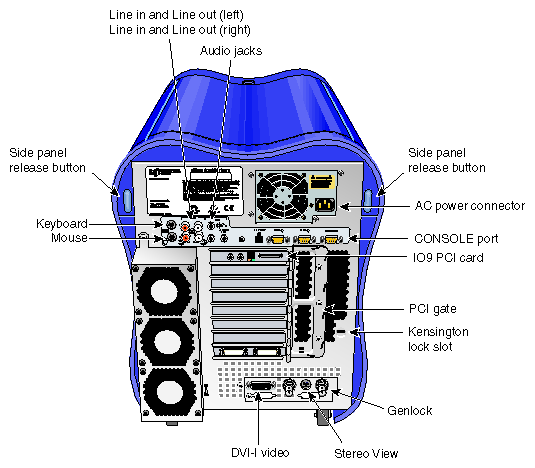
To become familiar with your workstation, refer to the following figures:
Figure 1-3, which shows the front view of the workstation.
Figure 1-4, which shows the rear view of the workstation.
After you have set up your workstation and logged in, refer to the following resources for more information:
From the Toolchest, select System > System Manager for information on the workstation's hardware and software.
From the Toolchest, select System > System Manager > About This System to learn about your system's serial number, IP address, operating system, and more.
To set up the workstation, follow these steps:
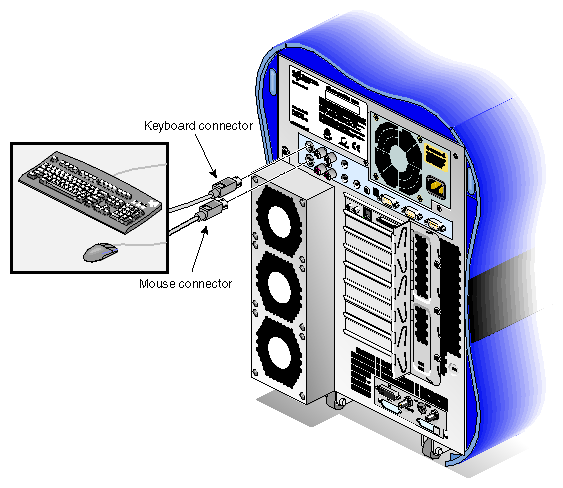
Connect the keyboard and mouse cables, as shown in Figure 1-5.
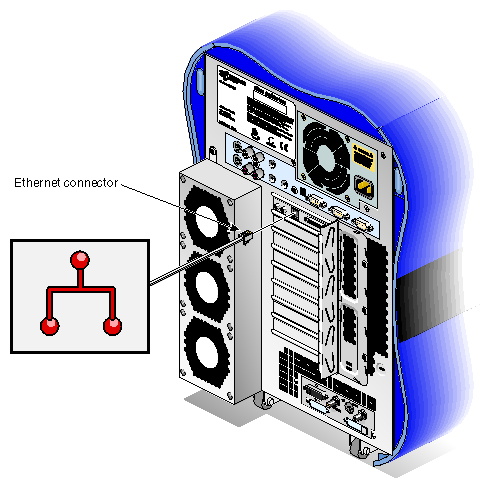
Connect the Ethernet cable to the Ethernet port on the IO9 card, as shown in Figure 1-6.
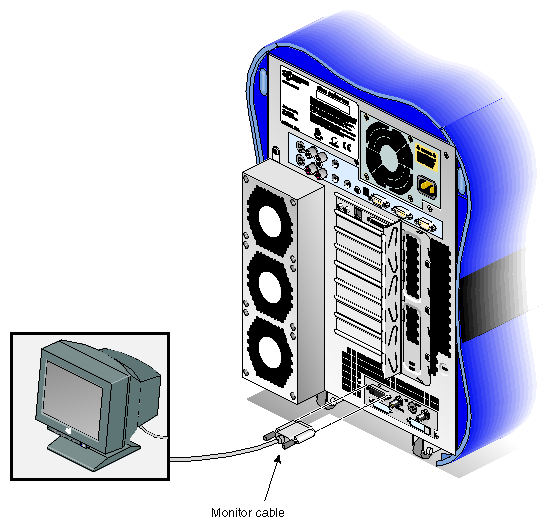
Connect the monitor cable, as follows (see Figure 1-7):
Connect the monitor-to-graphics cable to the monitor.
Connect the monitor-to-graphics cable to the DVI-I video connector on the back of your workstation.

Note: The workstation can be connected to a variety of monitors. Your monitor and monitor cable may differ from those shown. If your monitor has multiple inputs, ensure that the source switch is set to the correct input port.
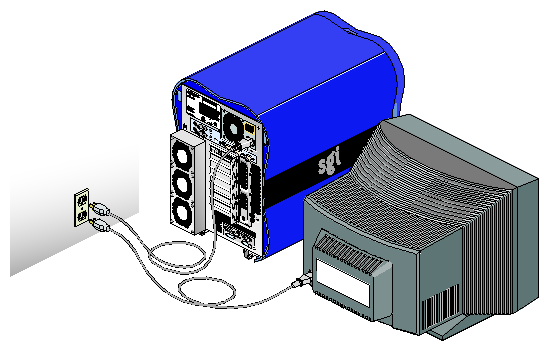
Connect the power cables to your workstation and monitor. Then plug them into approved electrical outlets (see Figure 1-8).
You have finished setting up your workstation. Proceed to the next section.
This section provides information about using your Silicon Graphics Tezro visual workstation. The topics covered include:
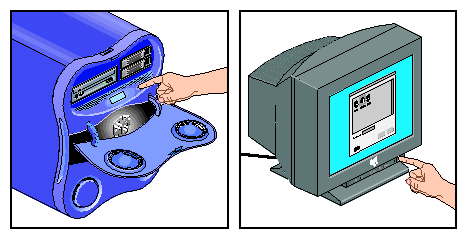
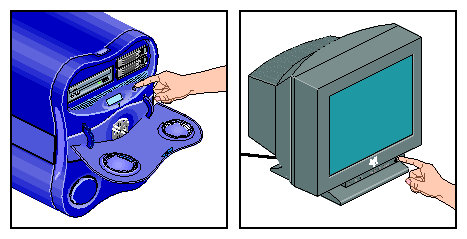
Press the power buttons on your monitor and workstation as shown in Figure 1-9.
A green LED flashing below the L1 display on the front of the workstation indicates that the system is booting. The monitor may remain blank for a few moments.
If your system is booting for the first time, you will see a login screen similar to the example shown in Figure 1-10.
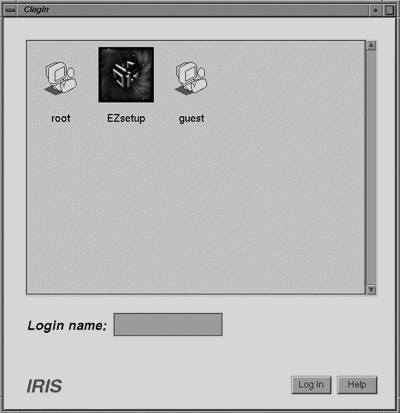
If you have a login account, double-click the icon with your login name. If you do not have a login account, double-click EZsetup and then follow the instructions for creating a personal login account and setting up the networking software. Then you can begin using the IRIX interactive desktop to create a personal work area and communicate with other users on your network.
After you have logged in, you are ready to use the IRIX Interactive Desktop. By default, several icons appear on your desktop: a folder icon representing your home directory, a dumpster icon, and icons for any peripherals you installed, examples of which are shown in Figure 1-11.
The peripheral icons show the current state of the respective devices. For example, if you insert a music CD into the DVD-ROM drive, the icon changes. When you double-click the icon, it opens CD Player, a utility that allows you to play music from a compact disc.
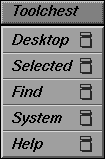
The Toolchest, located at the top left corner of your screen, provides access to system functions, applications, hardware and software information, and documentation, as shown in Figure 1-12.
| Note: For a complete description of the Toolchest, select Help > InfoSearch from the Toolchest, and type Desktop Users Guide. |
From the Toolchest, select System > System Manager to display the System Manager, which shows your workstation's hardware and software information.
From the Toolchest, select Help to display the library of online documentation. If your workstation is turned off and you cannot access online documentation, this printed guide contains all the information you need. You can also access this guide and most manuals, man pages, and release notes in the SGI Technical Publications Library at http://docs.sgi.com , and through InfoSearch, as described in the next section.
From the Toolchest, select Help > InfoSearch and type the name of the desired book or topic to search online books, man pages, and release notes that cover end-user, developer, and system administrator information.
The small box next to the Toolchest is the Console window, as shown in Figure 1-13. It appears as a small box because it is minimized. You can open it to its full size by clicking it. Many system status and error messages appear in this window.

If you click in the Console window, an IRIX shell appears, where you can type IRIX commands. For information on IRIX commands, select Help > Online Books. This will launch the InfoSearch tool, which allows you to read documentation stored on your workstation. Enter "Desktop User's Guide" in the Keyword search box. IRIX commands are covered in Appendix A.
You can shut down and power off your workstation in either of two ways, which are explained in the following sections:
To power off your workstation with the power button, follow these steps:
Open the door on the front of your workstation.
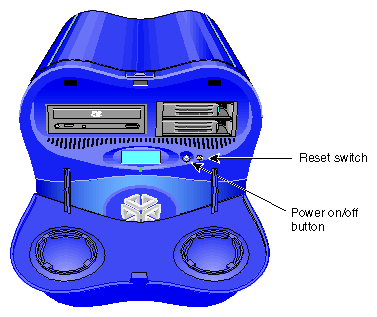
Press the power button, as shown in Figure 1-14.
Within a few seconds, a shutdown notifier appears, as shown in Figure 1-15. Within a minute, the system powers off automatically.
Turn off your monitor by pressing the monitor power button.
If your system does not power off and you do not see any activity for several minutes, press the power button again.
Note: If you press the power button a second time, the system should power off immediately, but this method does not perform a clean shutdown. Avoid using this method unless the system does not respond for several minutes after you first press the power button. If pressing the power button a second time does not work, use a pen to press the reset switch, shown in Figure 1-16. If the system still fails to power off, unplug the power cable from the rear of your workstation and contact your service provider.

If y ou have root level access to the workstation, you can shut down your system from the Toolchest. as follows:
From the Toolchest, select System > System Shutdown.
After a few seconds, a shutdown caution message appears, as shown in Figure 1-17.
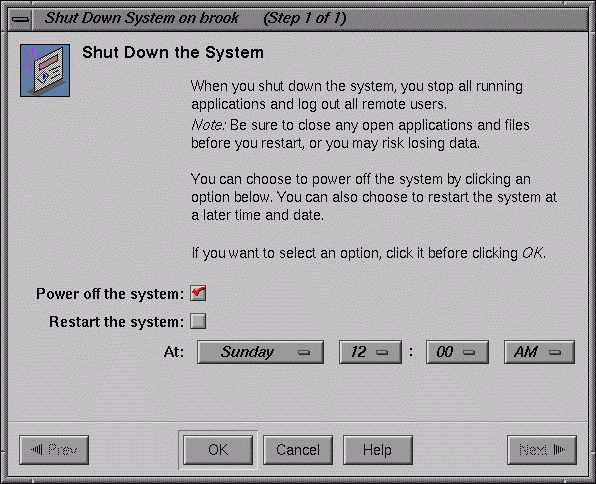
Click the Power off the system check box.
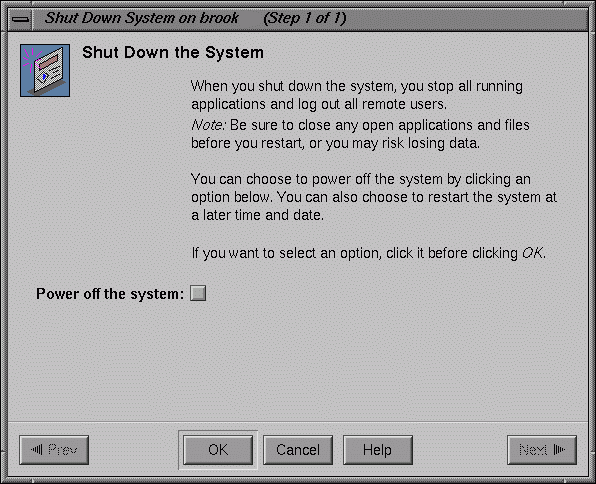
The Shut Down System window appears. At this point, you can shut down and power off the system or configure it to restart at a designated time, as shown in Figure 1-18.
Click OK to shut down and power off the system.
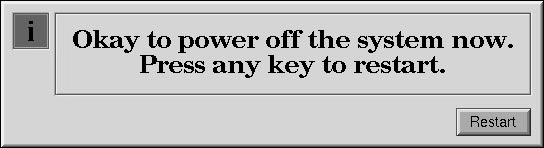
The shutdown notifier appears, as shown in Figure 1-19. After a few seconds, the system powers off.

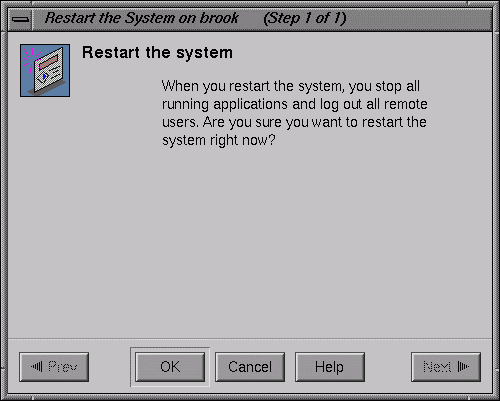
If you have root level access to the workstation, you can restart the system from the Toolchest.
From the Toolchest, select System > Restart.
After a few seconds the restart notifier appears, as shown in Figure 1-20.
Click OK in the restart notifier.
The shutdown notifier appears, as shown in Figure 1-21.
After a brief delay, the power off/restart notifier appears, as shown in Figure 1-22.
Click Restart.

The restart notifier informs you that the system is coming up (restarting), as shown in Figure 1-23.
