This chapter contains the following sections:
You may need to replace the power supply if it fails.
If the power is on, shut down the system and turn off the power. For detailed instructions, see “Shutting Down the System”.
Unplug the power cord from the back of the system.
Remove the side cover. See “Removing the Side Cover” for instructions.
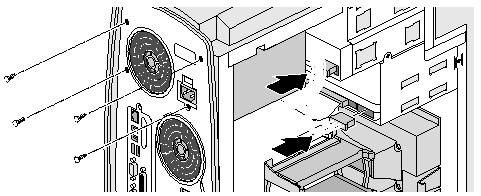
Look below the power supply and locate the two power supply cables attached to the system board. Disconnect them.
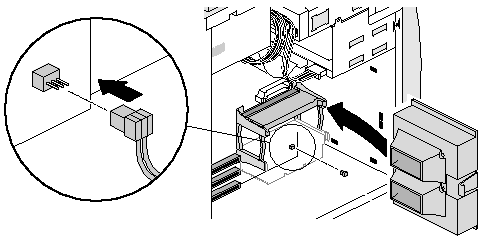
To disconnect the cable on the left, press down on the tab on top of the cable connector and pull the connector out, as shown in Figure 7-1.
To disconnect the smaller cable on the right, press up on the tab on the bottom of the cable connector and pull the connector out.
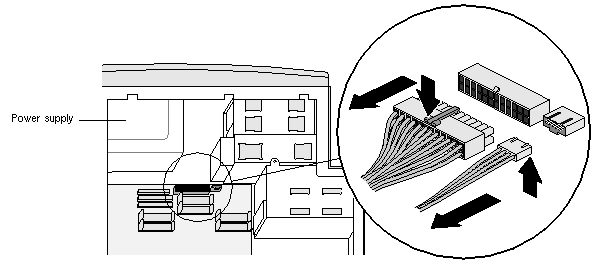
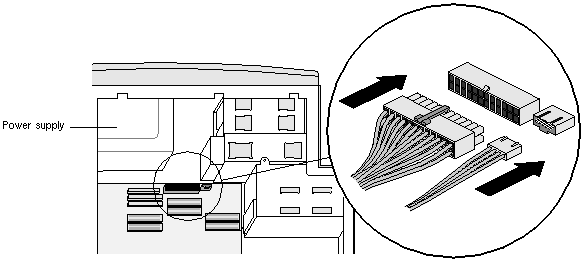
Disconnect the rest of the cables and remove the power supply, as shown in Figure 7-2
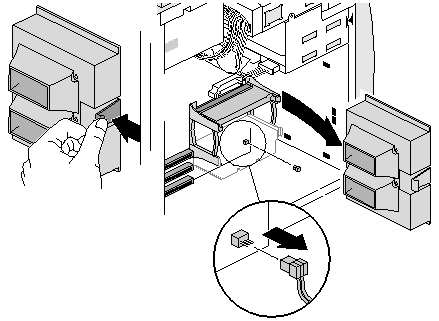
Carefully remove the power supply, as shown in Figure 7-3.
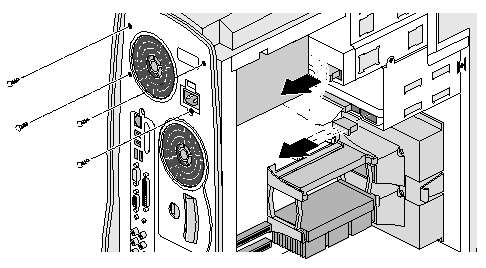
 | Caution: Since the power supply sits close to the DIMMs, carefully avoid contact with the DIMMs while removing the power supply. |

If you aren't replacing the power supply immediately, replace the side cover. For detailed instructions, see “Replacing the Side Cover”.
If you haven't already done so, remove the side cover. See “Removing the Side Cover” for instructions.
Check the voltage switch on the power supply to make sure it's set to the appropriate voltage setting for your power outlet.
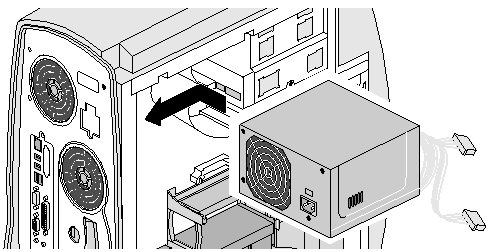
Caution: The voltage switch is preset at the factory for your country's voltage requirements. Verify the setting before installing the power supply. Slide the power supply into the top left corner of the system, as shown in Figure 7-4.
Caution: Since the power supply sits close to the DIMMs, avoid contact with the DIMMs while installing the power supply.
Rest it on the tab, as shown in Figure 7-5.
While supporting the power supply with your hand, replace the four screws, as shown in Figure 7-6. Then reattach the power cables to the backs of the internal drives.

Note: Since the space between the power supply and back of the floppy drive is tight, you may want to attach the floppy power supply cable to the back of the floppy drive first before you install the screws.
Reattach the two cables to the system board, as shown in Figure 7-7. The connectors for these cables are located below the power supply and above the center set of DIMMs.
Replace the side cover. For detailed instructions, see “Replacing the Side Cover”.
Reattach the power cord.
Turn on the system. For detailed instructions, see “Turning On the System”.

If the system does not power on, the power supply may be installed incorrectly. If the system powers on but the software does not boot, the power cable may not be properly attached to the system drive. If one or more of the internal drives is not recognized by the system, the power cables may not be properly attached to the drives.
Shut down and reopen the system. Verify that all the cables are attached correctly to the drives and that the power cord is attached to a power outlet. Close and reboot the system.
If it still does not turn on, the power supply may be defective. Contact your support representative.
Shut down the system and turn off the power. For detailed instructions, see “Shutting Down the System”.
Unplug the power cord from the back of the system.
Remove the side cover. See “Removing the Side Cover” for instructions.
Remove the fan, as shown in Figure 7-8.
If you're not replacing the fan right away, replace the side cover. For detailed instructions, see “Replacing the Side Cover”.
Caution: Do not run the system without a working fan installed. The system may overheat and damage the system board or other internal parts.
If you haven't already done so, remove the side cover. See “Removing the Side Cover” for instructions.
Install the new fan, as shown in Figure 7-9.
Position the fan so the tab is facing towards you and the power cable extends from the bottom of the fan.
Align the tabs on the fan with the holes in the chassis. Slide the fan into the space to the right of the processors until it snaps into place.
Insert the power cable into the plug below the processors on the system board.
Replace the side cover. For detailed instructions, see “Replacing the Side Cover”.
Reattach the power cord.
Turn on the system. For detailed instructions, see “Turning On the System”.