Welcome to the Indy™ workstation. The Indy Workstation Owner's Guide is your guide to installing, troubleshooting, and repairing your Indy workstation. Specifically, it tells you how to:
set up your Indy workstation, turn it on, and log in ( Chapter 2)
install and remove memory SIMMs (Single In-line Memory Modules) ( Chapter 3)
install and remove GIO (Graphics Input/Output) option boards such as video, network, or fast SCSI (Small Computer System Interface) controller boards ( Chapter 4)
install and remove internal and external peripherals, and serial, audio, and video devices ( Chapter 5)
install and remove optional software products ( Chapter 6)
diagnose hardware problems ( Chapter 7)
order and replace faulty parts (Chapter 8)
create a safe and comfortable environment for your Indy workstation and maintain the system correctly (Chapter 9)
Refer to this guide to set up the system, install hardware options, or find a solution when you suspect there is a hardware problem. Basic information on installing software is also included. For more advanced information on installing software and troubleshooting, refer to the online Software Installation Administrator's Guide.
The system and all the procedures in this guide are designed so that you may maintain and repair the system without the help of a trained technician. However, do not feel that you must work with the hardware yourself. You can always contact your maintenance provider to have an authorized service provider work with the hardware instead.
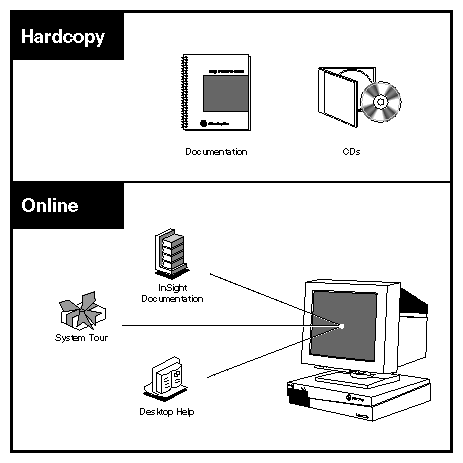
The Indy workstation ships with the following sources of information, as shown in Figure 1-1:
Indy Workstation Owner's Guide and pictorial setup poster
online System Tour
IRIS InSight™ online documentation and help (includes a catalog of all documentation)
IRIX™ Release Notes (on the CD)
The following sections contain information on options that can help you get your workstation up and running and help you become productive as soon as possible.
Refer to the Indy Workstation Owner's Guide (this manual) to set up the system and install hardware options, or find solutions when you suspect there is a hardware problem. In addition, it contains basic information on installing or removing optional software using the installation tool, Inst. For information on using the Software Manager to install software, see Chapter 4 of the online Personal System Administration Guide. For advanced information on software installation and troubleshooting, refer to the online Software Installation Administrator's Guide.
The online documentation package is called IRIS InSight. The InSight icon is shown in Figure 1-3. To view the manuals, from the Help toolchest, choose “Online Books.” You see bookshelves for end-user, developer, and administration manuals that ship online with the system. Double-click on a book to open it.
For a description of the manuals and a listing of manuals that are available to purchase in hard copy, double-click on the Documentation Catalog.
The online System Tour introduces you to the features and functionality of Silicon Graphics, Inc.'s Indigo Magic User Environment. This environment combines a unique desktop management system with digital media tools in one “Media User Interface” that uses audio, video, and graphics.
Additionally, the System Tour teaches you how to use many of the tools available in the environment. To view the System Tour, double-click the System Tour icon (shown in Figure 1-4) on the desktop.
This Indy Workstation Owner's Guide uses these conventions:
References to documents are in italics.
References to other chapters and sections within this guide are in quotation marks.
Names of onscreen buttons are in italics.
Names of menu choices are in quotation marks.
Numbered sentences are steps that you follow to complete a task. Below a step, sentences preceded by a box describe in detail how to do the step. For example:
Connect the Ethernet AUI cable to the Ethernet AUI port on the back of the Indy workstation.
Make sure the sliding bracket on the Ethernet port on the system is pushed all the way left.
Plug the cable into the port.
To set up the Indy workstation, use the poster you received with the system, and then see Chapter 2, “Getting Started.” This chapter tells you how to put all the pieces together, turn the system on, and set up your login account and network connection software.
To install extra SIMMs, see Chapter 3, “Installing Memory.”
To install GIO option boards, see Chapter 4, “Installing GIO Option Boards.”
To install peripherals, see Chapter 5, “Installing Peripherals: Internal and External Devices.” This chapter tells you how to install internal and external drives, serial devices, and audio peripherals.
To install or remove Silicon Graphics software, see Chapter 6, “Installing and Removing Software.”
If you have a problem while powering on or using your Indy workstation, see Chapter 7, “Troubleshooting.”
To order and replace parts, see Chapter 8, “Ordering, Removing, and Installing Replacement Parts.”
For information on maintenance and some tips on making your work environment comfortable, see Chapter 9, “Safety, Maintenance, and Regulatory Information.”
In addition to this manual, the Indy workstation ships with an online documentation package called IRIS Insight. To open IRIS InSight, choose “Online Books” from the Help toolchest.